To You From Me

Each year I like to make my own Xmas paper and cards using home-carved stamps. I’ve blogged about it before here and hereThe cloud design came from an excellent stamp carving tutorial, although I don’t use an eraser for my stamps (I’ve tried it before and it’s too crumbly). Instead I use proper stamp material which I found at the Takapuna Art Shop. As well as printing wrapping paper and cards I made these two decorations for a a friend by stamping fabric paint onto linen.

Heart house

To You From Me

IMG_3190

This year I’ve also been making advent calendars. I made quite an elaborate one for Sam, as well as a simpler one for my friend Meg. This advent jar would be good for someone who doesn’t want a daily chocolate dose (seriously, who is that?).

Jar advent

Book Review: Polly Petunia Finds Her Place

Polly Petunia Finds Her Place
Written and Illustrated by Katie Rogers
Kokomo Books, RRP $18.00

This sweet children’s book was sent to me by Katie Rogers of Kokomo Books who both wrote and illustrated the book. It tells the story of Polly Petunia, a headstrong doll who as been abandoned by her owner for a new bicycle. With the help of her friend Twitch the fantail, Polly moves to the city of Wellington to find her new place in the world. The book details Polly’s adventures, from playing dress-ups, going to the zoo, eating ice-cream, and visiting the library. For those parents who want books without the usual gender stereotypes, Polly also likes “creatures,” practises “karate,” jumps in “puddles,” and pretends “to be on safari.” The moral of the story: “just be you!”

Many kids will relate to Polly’s adventures and see themselves in the pages of the book. The illustrations are also colourful and interesting. Constructed out of fabric off-cuts and paper dolls (Polly Petunia originally started with Katie telling stories to her daughter using a paper doll), the pictures are quirky and crafty. The book itself would be a good starting point for children to make up their own stories and pictures, and will definitely appeal to crafty mums and dads. While some of the story is a bit laboured, and the wiggly layout can make it difficult to read, I applaud Katie for self publishing her stories. Further installments of Polly Petunia are planned for the future.

Polly Petunia Finds Her Place

Tuesday Craft: The advent calendar

Pockets

Advent calendar

hand stitching

I can’t remember where the idea came from to make Sam an advent calendar. I know I wanted to make something hand stitched, because I find it rewarding. I also want to start a family tradition. I like the idea of bringing out an advent calendar each December; of it being part of his Christmas memories. I made up the pattern as I went along. You can too. I decided how big I wanted each pocket (big enough for a substantial chocolate) and went from there.

The body of the calendar is made from linen and is backed with white calico. The pockets are grey wool felt, which are stitched with embroidery thread. If I had one piece of advice for making this sort of calendar, it would be to double stitch the top of the pockets. I forgot to do this, which means the top stitch easily unravels through the linen, and I had to go back and double stitch them once I was finished. There is a wooden strut at the top so the calendar will hang nicely.

The designs for the embroidery along the bottom came from a Scandinavian print I found on the web, and I changed them just enough to not feel too bad about using the design, and also added some of my own. I traced them onto embroidery paper and stitched through the templates using chain stitch (the easiest and prettiest of stitches), and french knots. I’ve never done this sort of embroidery, but I’ve been inspired by Tiny Happy. Each pocket has it’s own activity card. The end of the year, for me, is about giving, togetherness, and reflection. These are some of our activities:

  • Read a Christmas story
  • Give canned goods to charity
  • Make reindeer food
  • Go out and look at the night sky
  • Compliment a stranger
  • Write down five things you’ve been thankful for this year
  • Build a fort and have dinner in it
  • Learn about the celebration traditions of another culture

You can download a PDF of my advent cards if you want to make your own calendar. Since I didn’t start out with a colour palette, the hardest part of the project was finding the right paper backing for the activity cards. I found the final card at Made on Marion on Marion Street in Wellington. And that’s my advent calendar.

Tuesday Craft: The great stash rehash

package

Recently I took part in the great stash rehash, which was an idea thought up by Emma from Emma MakesBasically, it’s a way to swap crafting materials that no longer inspire you (but are quality materials in good condition), for ones that will bring new inspiration. To do this, I signed up to send either a $6 or $9 parcel post bag of fabric and crafting stuff to another crafter, assigned by Emma. The sign-up form asked questions about what sort of fabric I wanted to receive.

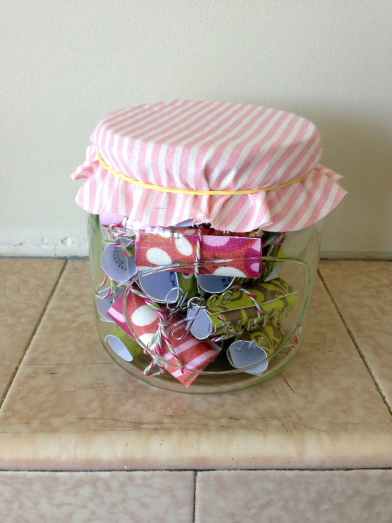
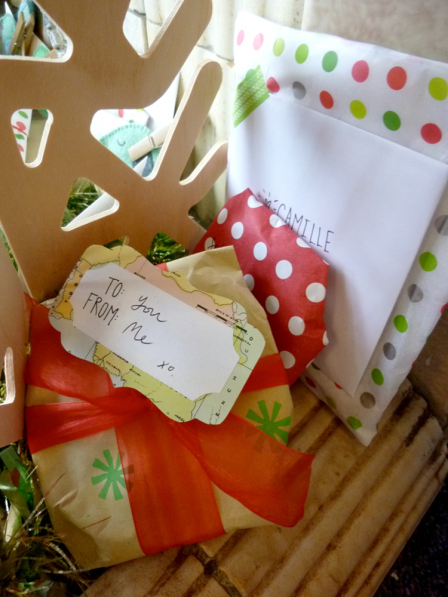
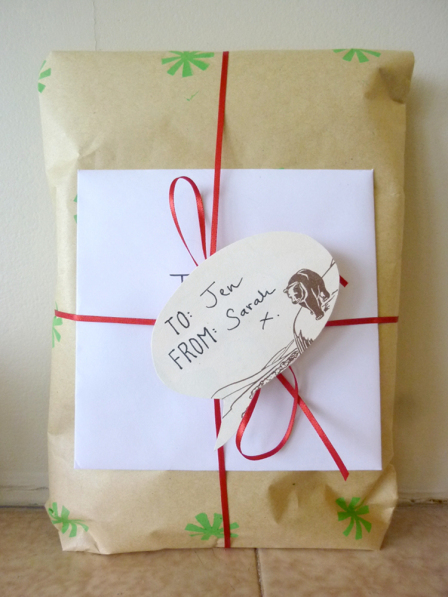
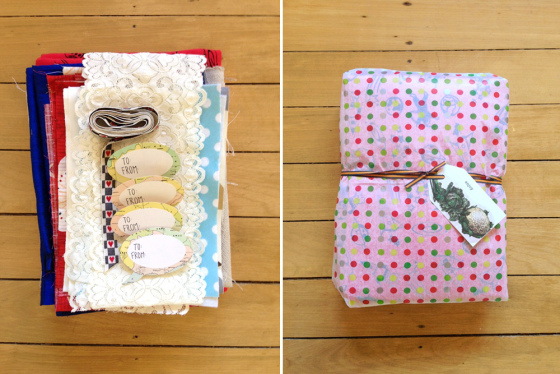
The image above is the package I made up for my swap. It had neutral linen, lace, a vivid blue silk, red polar fleece with astronauts and stars, some heart ribbon, gift tags, a giant vintage button, cotton fabric with a Japanese print, and some polkadot felt. It was really exciting sending it away. One of the conditions of taking part was to write the recipient a nice note, which I think sums up the spirit of the swap.

IMG_1236

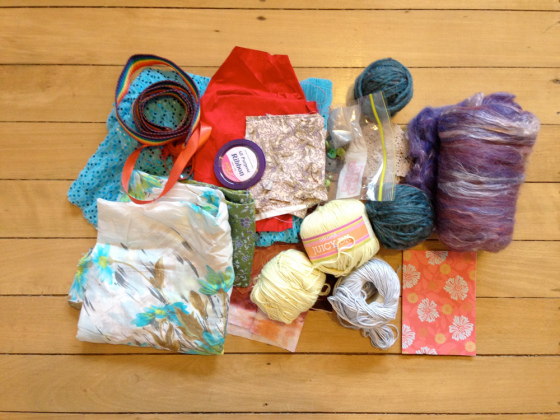
Today I received a lovely package of fabric, buttons, ribbon, doilies, and wool. I think the white and blue floral fabric in the bottom left of the photo will make a nice lining for a bag. I also enjoyed receiving a note with the package, and hearing about how the crafter put the package together. I was especially inspired by the wool, and think I will make some pom pom flowers. Some of the wool is hand dyed and unspun (and beautiful), so I think I will make that into felted bowl. I love the way the surprise of the swap has inspired so many new ideas.

Montessori Crafts

Over the last month I’ve become interested in creating a Montessori style household for Sam. We were already doing a lot of the Montessori ideas, but one idea I’ve found useful is to separate Sam’s toys into baskets and activities (before they were all in a heap in his toy basket). It’s much easier for him to get to his toys, and easier for me to model how to put them away (and encourage him to do so!). Last month Sam started counting, so I wanted to make him a counting activity that was multi-purpose. I made him these counting bean bags, which are a very easy sewing project.

Counting bean bags

Each bean bag has a different fabric on the back, and I hand stitched the number on the front using chain stitch and a dark blue embroidery cotton. They’re filled with rice so are good for throwing, but don’t hurt if they hit another person or cat. We got the bowl from TradeAid. These are some of the games you can play with them:

  • Memory. As each bag has a different pattern on the back it will be easier for a child than traditional memory. A variation on the game is just turning each bag over and naming the number.
  • Name the number / throw the bag in the basket. This is our favourite game at the moment. We pick up a bag, name the number, and then throw it in the basket.
  • Putting the bags in sequence. Sam’s too young to do this at the moment, but we put them in sequence and then count down the line together. He also like to dance up and down the line of bags.
  • Putting objects by the bags. For example, if you have the number two bag, then put two objects by the bag.
  • Basic maths. When Sam is older I will make plus, minus, equals, and division bags so he can practise his maths.
  • Hitting the bags with a hammer. Maybe that’s just Sam!

IMG_1117

‘Woof’ the Rabbit

On Friday night I made a rabbit softie from a free tutorial and pattern on larkcrafts.com. I haven’t done much sewing this year since I’ve been saving my energy for the PhD. I think the rabbit (originally called ‘hoppy’) would make a nice gift for both kids and adults. I know I’d like my own hoppy (I intend to make one with a little shirt pocket on the front, one with buttons, and one with a flower!). The tutorial recommends using an old scarf with interfacing, but I want to use up some of my fabric stash so used some leftover linen. In the end I didn’t really need to use interfacing as he came out a bit stiff, but Sam doesn’t seem to mind. When I asked Sam what his name was he said, “Woof,” and then carried him around all day. He’s the perfect size for tucking under a toddler arm.

IMG_0778

IMG_0769

IMG_0775

Tuesday Craft: I’m dreaming of a brown paper xmas

It’s December, which means the Christmas tree is up and my wreath is on the door.

Tree

I am really enjoying making my own cards. At the moment I’m using a a combination of bought and hand-carved stamps. The bunting and star are my own creations, and I think the star works well on both the cards and the wrapping paper. My hand carving is getting better, although I’m still not that good. I bought the plain cards and envelopes off Trademe, and the brown paper from the $2 shop. The gift tags I made from old map cards, manila card, and bamboo pegs (which are on the back so you can attach them to a present). I’ve written some other posts about home made gift wrapping and Christmas.

Stamped cards

To you, From me

To Jen

These are some catnip birds that I made for the cats and cat owners I know.

Catnip birds

Finishing off my wares

Last weekend I finished off the wares I will be selling at the Craft Country Fair in December. It feels good to see a few months of crafting lined up in my study. One of the things I like about making things from hand is the frequent moments of satisfaction that come from completing each project (compared, say, to doing a PhD, which is definitely a long game). Below: Speech bubble gift tags made from old map cards, which for some reason have bears on their reverse side (the tags have pegs on the back). Two of my cushions, apple & pear decorations, and environmentally friendly fire starters.

Craft Country Fair … here I come!

This year I’m holding a stall at the Craft Country Fair, which is at the Greytown town hall on Saturday 15 December. This will be the first time I’ve had a craft stall so I am a combination of excited and petrified! Sewing–especially hand sewing–is how I relax in the evenings. Over the years I’ve made a lot of handmade gifts for my friends and family, and … well … I think they might be getting a sick of it. My mother’s kitchen looks like it’s been taken over by my sewing room. I applied to do the fair in order to have an outlet for my craft, and to fund the next round of crafts. I hope that everyone can come take a look on the day.

As well as the upcycled wool cushions I’ve been making for awhile (at the fair I will have cortina, robot, and waxeye designs), I will be selling washable fabric ecolids, which are great for taking salads to summer BBQs in style, or covering food in the fridge, hand stitched apples and pears for wee gifts or brightening up your Christmas tree, and some environmentally friendly fire starters. I’ll also be selling my collection of poetry. Here’s a sneak peak of a few of my wares:

Ecolids - we use ours every day.

Tuesday Craft: Simple scarf and fabric basket

I can’t believe this is my first craft post of 2012. Then again, it hasn’t been a big crafting year with Sam and a PhD to keep me busy. This scarf  was actually knitted last year as a Christmas present for my dad. The pattern is called ‘manly scarf,’ but I think it could be worn by both men and women. I knitted it with a small needle size so the scarf ended up using a lot more wool than I thought it would (four balls). I say this because I managed to buy some of the wool on sale, but when I ran out I had to pay full price. So if you want to knit the scarf, get four balls up front. The scarf needed some blocking at the end to make it symmetrical and flat, but that quite an interesting process. The pattern is a simple two row repeat, and free from Shifting Stitches.

My second project is a fabric basket for Sam’s toys. I made it during May, 2012. Unfortunately the photograph doesn’t show the linen base (the same fabric as the handles), which I think is the best part. The pattern comes from Pink Penguin, although for my basket I scaled it up by 250% as I needed it to be large. If I was going to make this basket for myself or as a gift, I’d skip the patchwork (it was fiddly and time consuming), and just use a patterned fabric. The look would be a little more sophisticated.